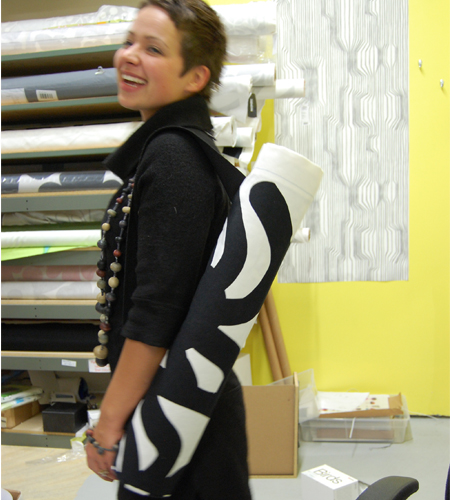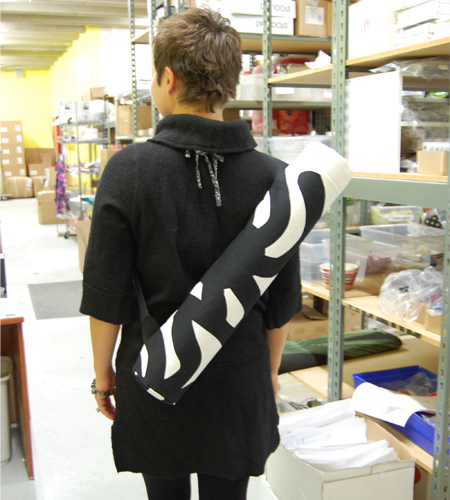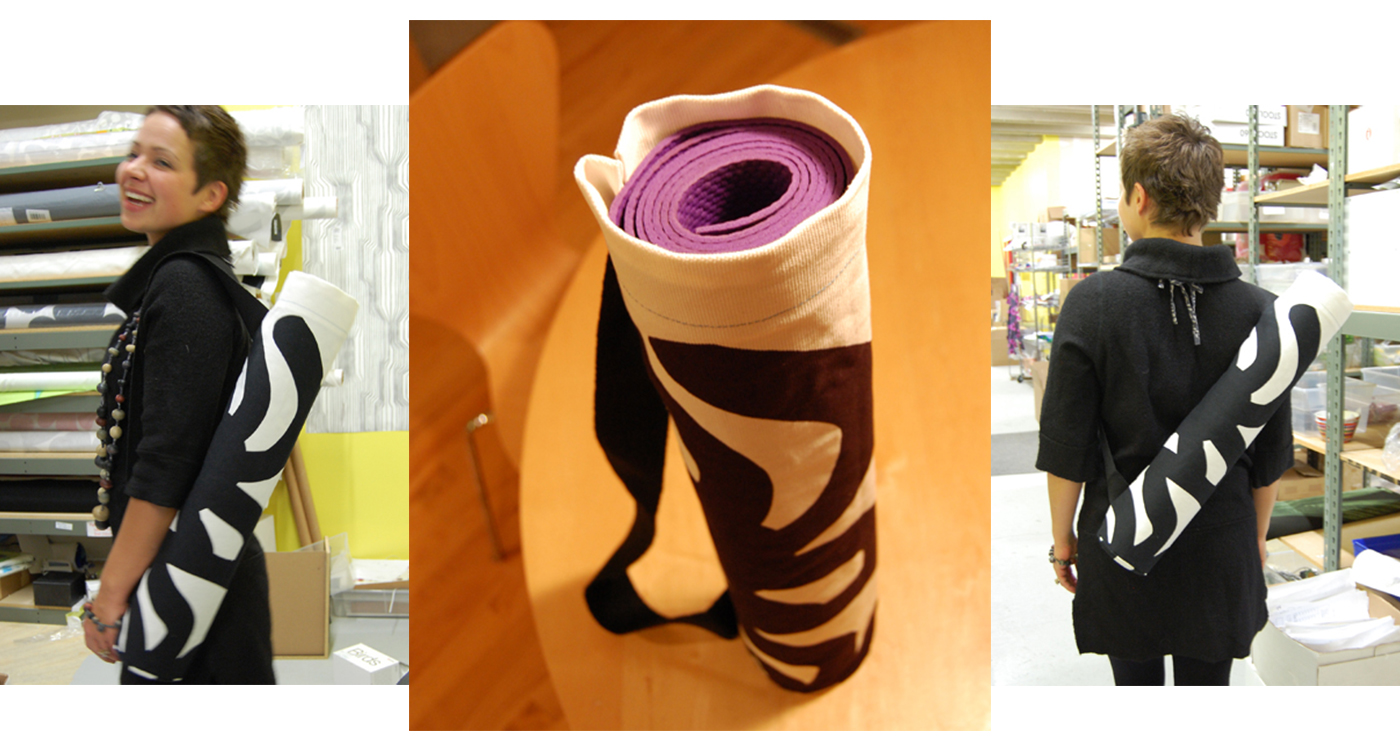
A purely remnant-inspired project, the idea for creating this Marimekko Yoga Mat Bag came after rummaging through our remnant fabric bin at work. Inspired after reading the Marimekko Surrur book, which walks you through countless inventive crafts sewn by Marimekko designers, I decided to create a sewing project out of an unused piece of Marimekko Joonas Upholstery fabric by Maija Isola.
With less than 1 yard of fabric and a discarded piece of Aalto black webbing (designed by Alvar Aalto, a famed modern architect and glassware designer from Finland). In 10 quick steps I’ll show you how to make a Marimekko Yoga Mat Bag that melds modern design with meditative spirit.
What you’ll need:
– ½ a yard of Marimekko Upholstery fabric
-1 yard of Aalto webbing (for the strap)
-yoga mat (I have a standard size mat from Target)
-sewing machine
-scissors
-pins
-pencil
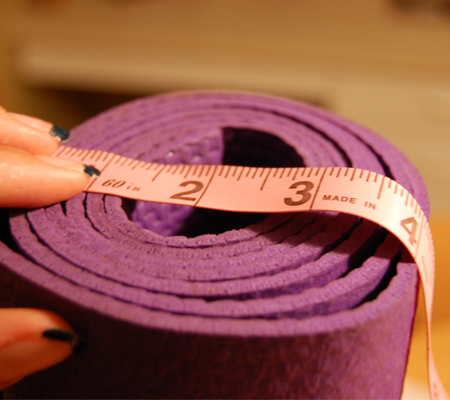
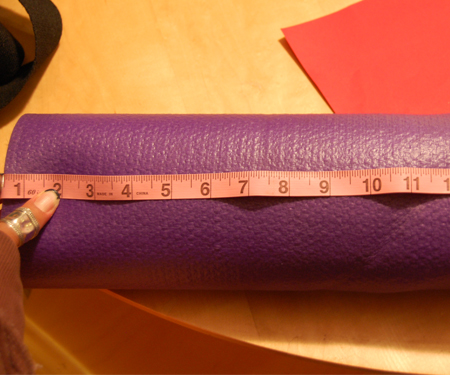
Step 1: Measure your yoga mat
Roll up your yoga mat and measure the length, width and circumference. When rolled, my mat measures 24” L x 4” W with a circumference of 13”.
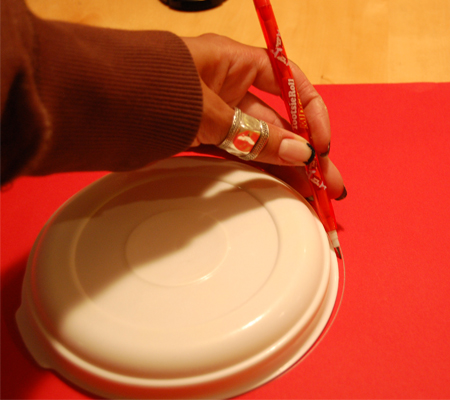
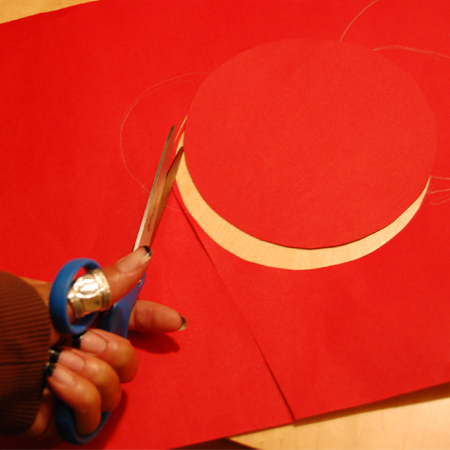
Step 2: Cut the circular-shaped bottom pattern piece
This piece should be slightly larger than the width of the bag. I made my bag an inch larger than my mat so add 2 inches to the bag’s width plus ½” for seam allowance and you should arrive at the diameter for your pattern piece. Use a protractor to draw the circle or I had a plastic container the same width so I traced it to get an even circle. My circle pattern piece is 6-1/2” in diameter.
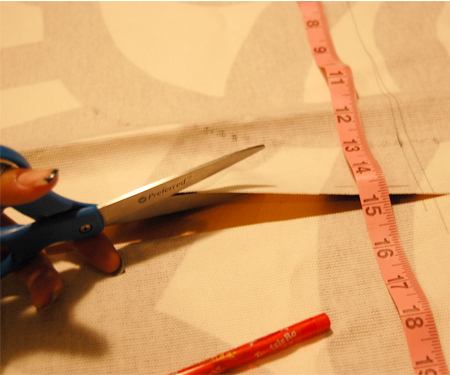
Step 3: Cut out the fabric
Use the dimensions of your mat and add 4-1/2” inches to get the length (1/2” for seam allowance & 4” for the top drawstring loop) and add 3-1/2” to the circumference to get the width (1-1/2” for seam allowance & 1” to allow adequate room for your mat to slide in and out). My fabric measures 28-1/2” L x 16-1/2” W.
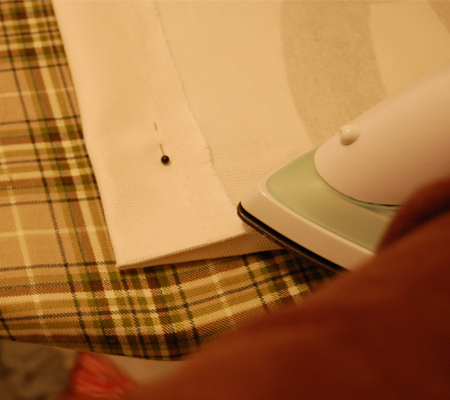
Step 4: Press the seams
Wrong side facing up, press a ½” seam along the length of the fabric. Also press a 2” seam along the top end (this will create the loop through which you’ll put the drawstring.
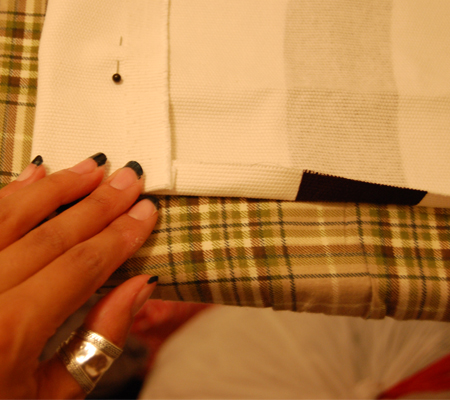
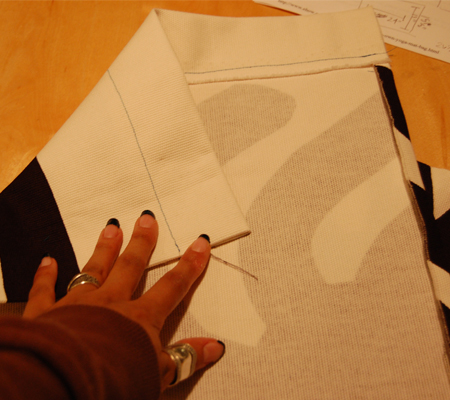
Step 5: Sew the top
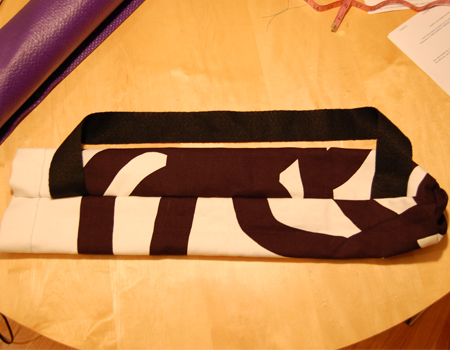
Wrong side facing up, sew the top (about ½” from the edge) to create the drawstring loop. See image.

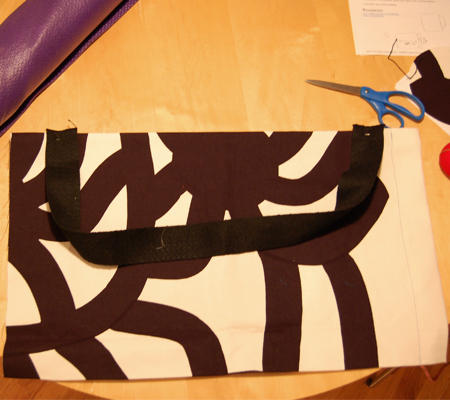
Step 6: Pin the straps
Working on the right side of the fabric, pin the Aalto webbing strap to the fabric. The bottom strap should be 2” from the bottom & the top strap should be 1” from the top seam. Note: Make sure to match-up the seams you made in step 4.
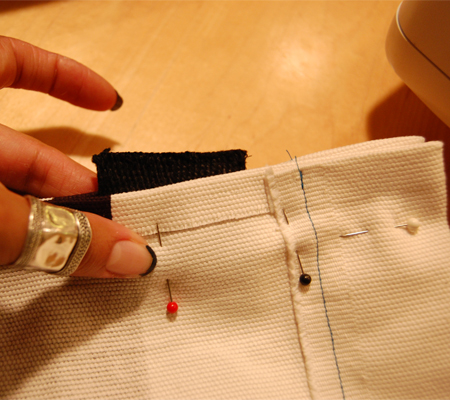
Step 7: Sew the length of the bag
Bringing the right sides of the fabric together, sew along the edge. Note: when sewing this you will be trapping the strap inside the tube you are creating.
Step 8: Pin the bottom
Step 8 & 9 will probably the most difficult part. Match up the edges with the right sides together and uses as many pins as you need to secure the bottom.
Step 9: Sew the bottom to the tube
Remember, slow and steady wins the race. Go slowly as you sew at this step, taking the pins out as you go. Note: I also zigzag stitched the edges of the bottom to reinforce the bag and to keep the upholstery fabric from unraveling.
Step 10: There is no step 10
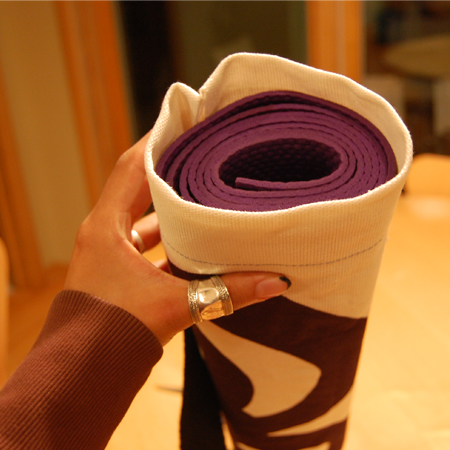
Just turn your bag inside out and run a cord through the drawstring loop…done, you’re now ready to head to your next yoga class. Personally, I chose not to use a drawstring because I loved the clean and streamlined look of the Marimekko Joonas Fabric.
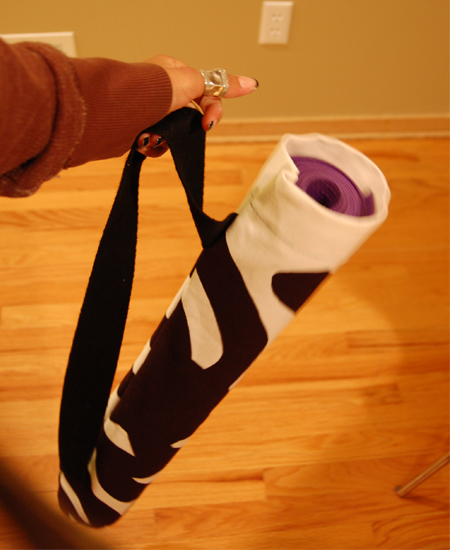
Additional notes: If you’d like a slimmer or wider bag change the pattern as you see fit and heck, if you’re ambitious add a pocket to hold your personal items. Whatever improvement you choose, I hope this sewing project inspires your creativity. Happy sewing and Namaste.